What you don't know may hurt you


With the rise in breaches and increased focus on cyber security by companies, it is easy to forget that your home is just another IP in the sea and automated attacks don't know (or care) if you are HugeCorp Inc or Billy-Maria Smith.
With the current pandemic, many of us are working from home and we might be using home computers to access work data (you know you do it) which mayhap are not as secured as your company-issued hardware.
With that in mind and as a fun little exercise, I set out to use Azure Sentinel to collect and analyze logs - this is that story.
The setup - a drawing
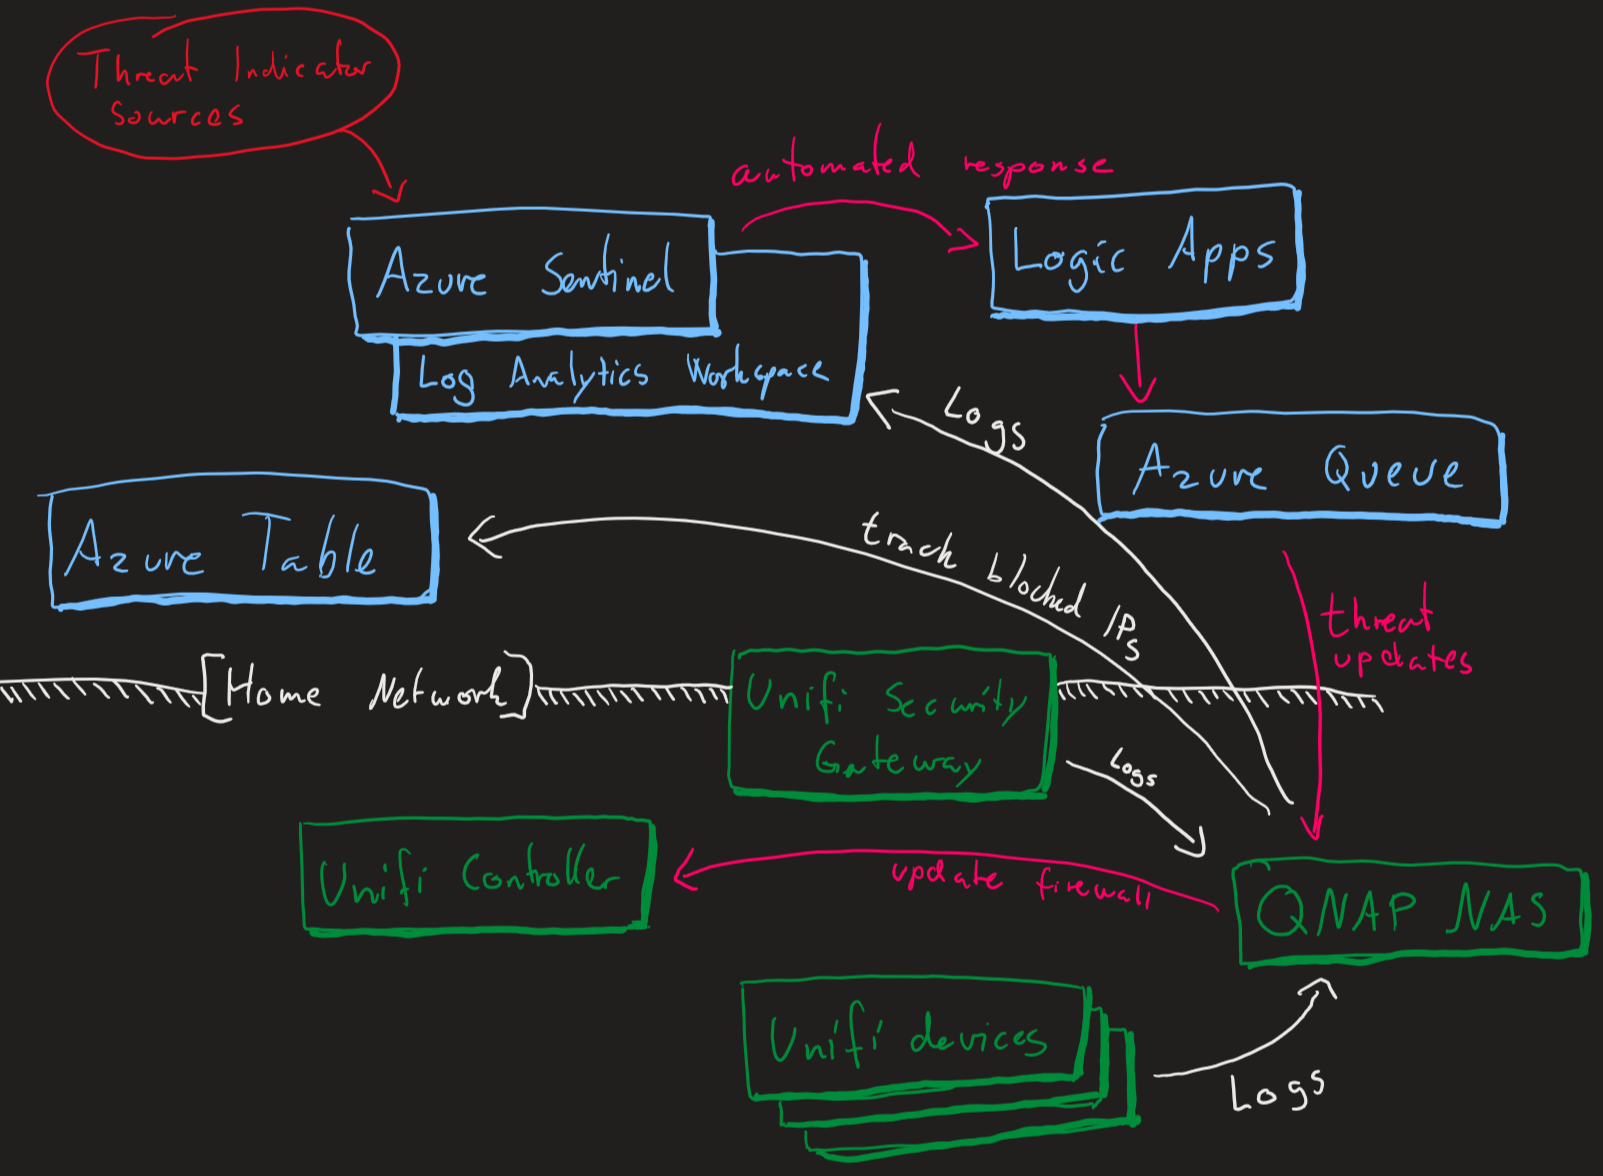
In short - gather logs from my devices@home and send them to a Azure Log Analytics Workspace for Azure Sentinel to act upon. Once an alert triggers Sentinel will run a playbook (Azure Logic App) that adds messages to a queue which is handled by a script running locally on my NAS to update the firewall.
Setting up Azure Sentinel
Azure Sentinel is Microsoft's cloud-native SIEM that provides intelligent security analytics for your entire enterprise at cloud scale.
This SIEM as a Service (SIEMaaS) solution is designed as a cloud-based security-monitoring platform that leverages the power of the cloud for analytics and detections.
First, you need a Azure Log Analytics Workspace.
About Azure Monitor Log Analytics
With Azure Monitor Log Analytics you can easily store, retain and query data collected from your monitored resources in Azure and other environments for valuable insights.
A Log Analytics workspace is the logical storage unit where your log data is collected and stored.
A Log Analytics workspace is the basic management unit of Log Analytics.
In other words, its somewhere to store logs from any source and query them.
Open the Azure Portal and create a new resource (search for Azure Log Analytics) - assign a resource group, name and pricing tier of your choice.
Next, create another resource - search for Azure Sentinel and assign the Log Analytics Workspace you just created.
That's pretty much it - it doesn't do anything, but it's been brought forth into existence!
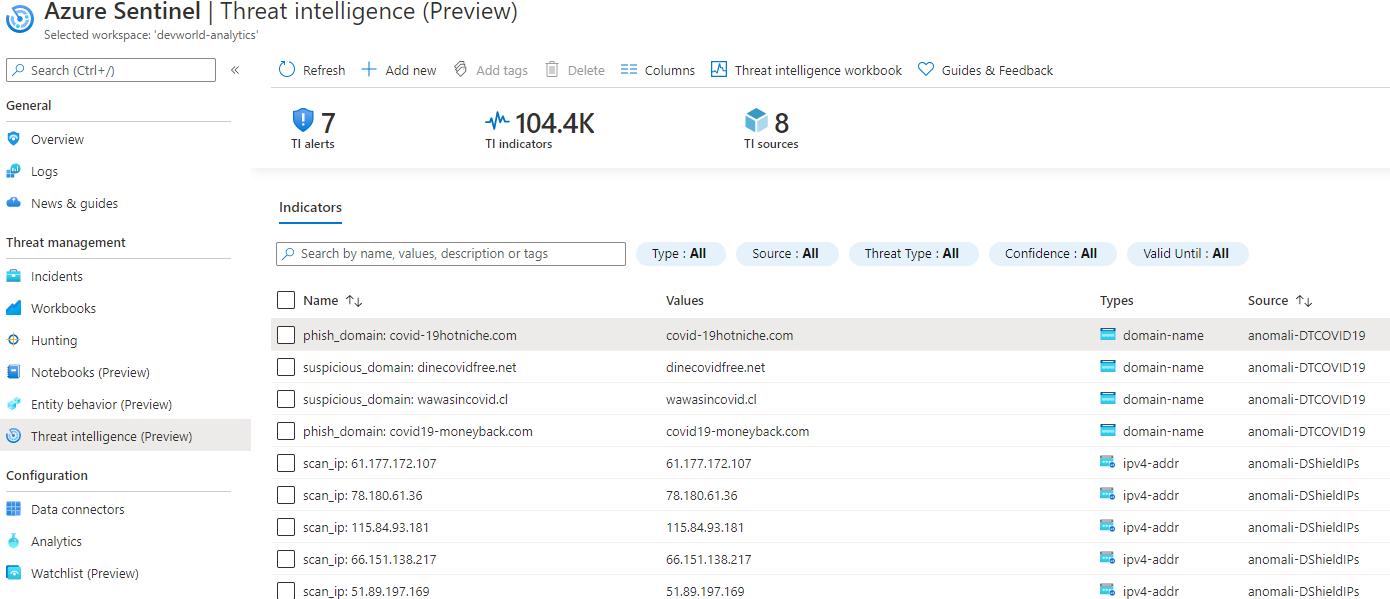
Adding threat indicators to Azure Sentinel
The more you know, the better off are you and threat indicators helps you by indicating what the threats are out there (clue is in the title).
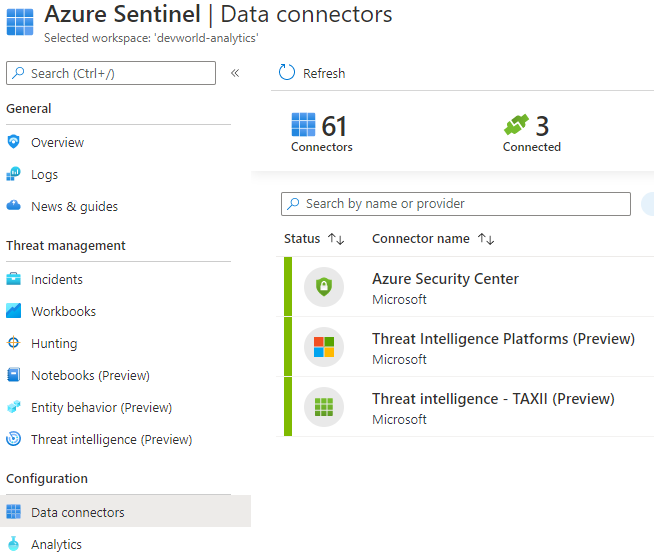
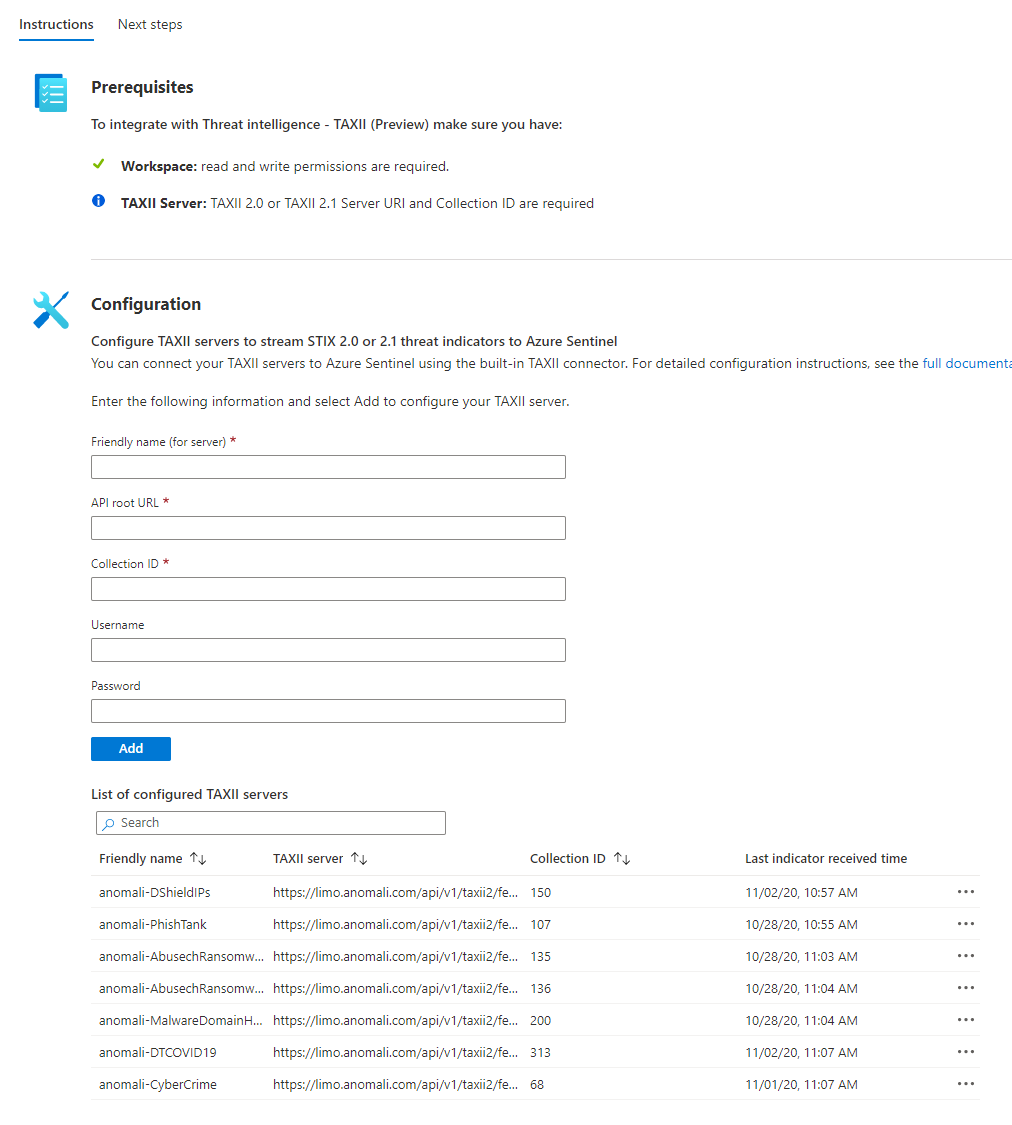
The easy (and free for use) source to use it Anomali Limo which we will set up using the data connector called Threat intelligence - TAXII (found under the Data connectors section).
When you open the connector page, you will be presented with a form to add sources.
Another source you can add is OTX AlienVault which is a bit different and explained nicely here.
All of these indicators are stored in the log called ThreatIntelligenceIndicators for use with your queries or browsable under Threat Intelligence:
Adding our first alert
Now that we have logs from our devices (read this post for my setup) and some threat indicators to compare the logs against - lets see if any of our incoming traffic is suspicious!
Move on over to the Logs query section.
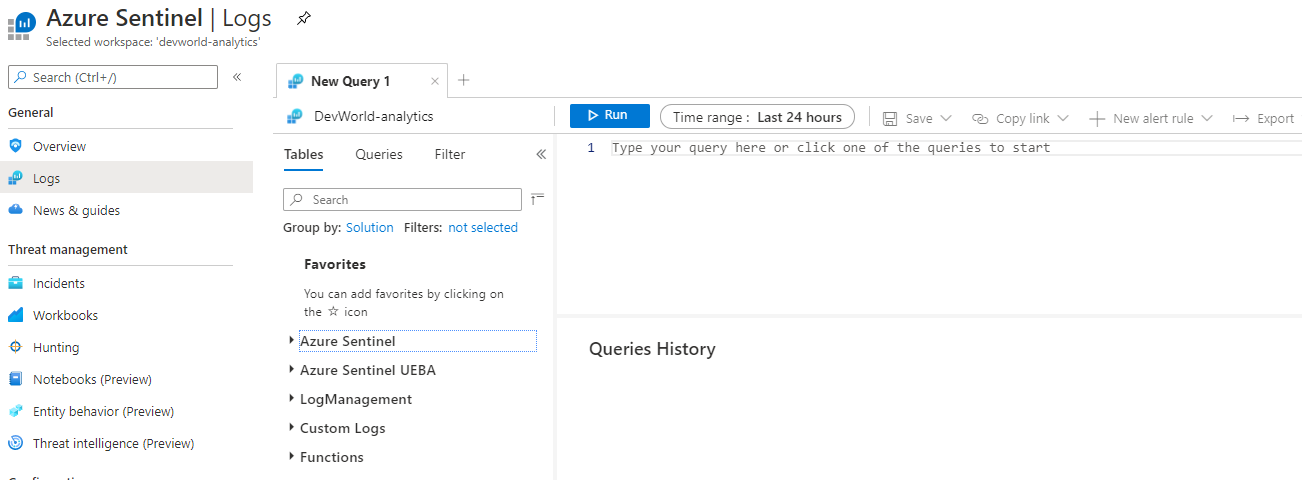
By joining the ThreatIntelligenceIndicator and UnifiFirewallLogs_CL (my custom firewall log from my Unifi Security Gateway), I can find the IPs that have tried to connect to my home network in some way.
let ipIndicators = ThreatIntelligenceIndicator
| where NetworkIP != ""
| project SourceIP = NetworkIP, Description;
ipIndicators
| join (UnifiFirewallLogs_CL) on SourceIP
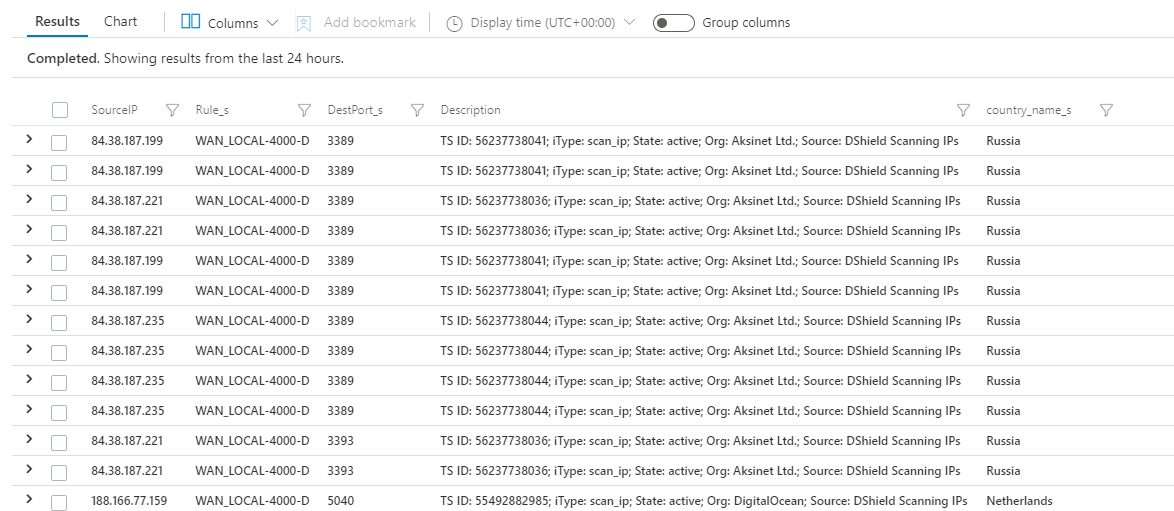
| project SourceIP, Rule_s, DestPort_s, Description, country_name_s
And it does, in fact, turn out that we have some flagged IPs trying to scan the network.
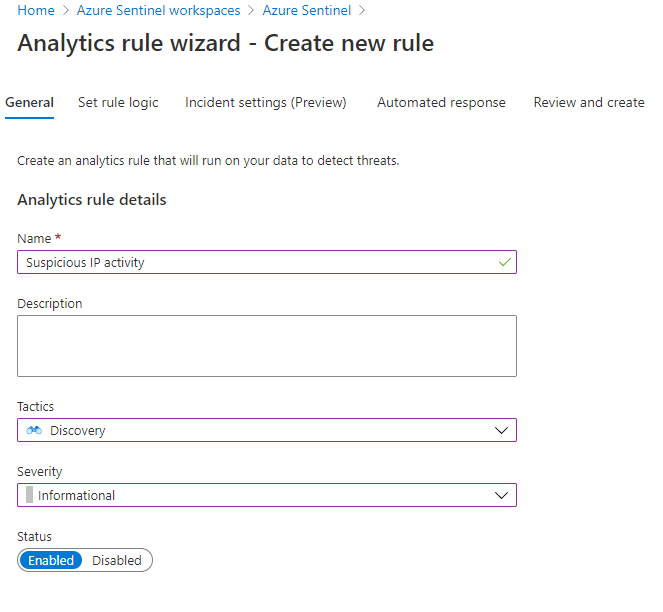
If this is something you'd like to be alerted of or handle in some way, all you need to do now is click New alert rule

Give the rule a name and description and tag it with what kind of tactics you classify this kind of activity is indicative of.
For example, Discovery for scanning activity. It's not an attack, so Severity can be set to Informational.
Alert rule logic
Next, we set the Rule Logic - here we can also let Azure Sentinel know which entities are part of this incident.
We do that by mapping our SourceIP field to IP and click Add
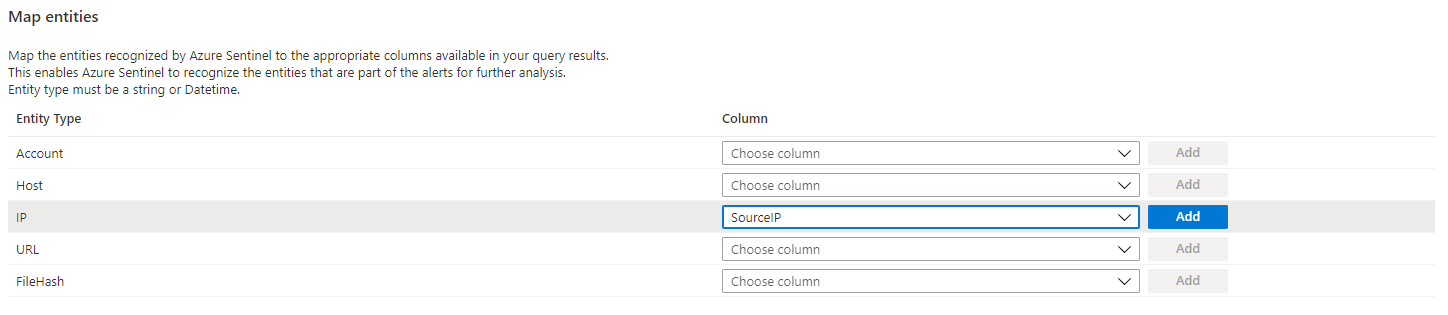
You can also change the last part of the query to rename the SourceIP to IPCustomEntity.
let ipIndicators = ThreatIntelligenceIndicator
| where NetworkIP != ""
| project SourceIP = NetworkIP, Description;
ipIndicators
| join (UnifiFirewallLogs_CL) on SourceIP
| project IPCustomEntity = SourceIP, Rule_s, DestPort_s, Description, country_name_s
Next, you set the scheduling of the alert - how often should it run the query and the time window for the data it should query over.
Default it runs the query every 5 hours across the data that has been accumulated in the past 5 hours. You can tweak this to your liking - the shortest query schedule is every 5 minutes.
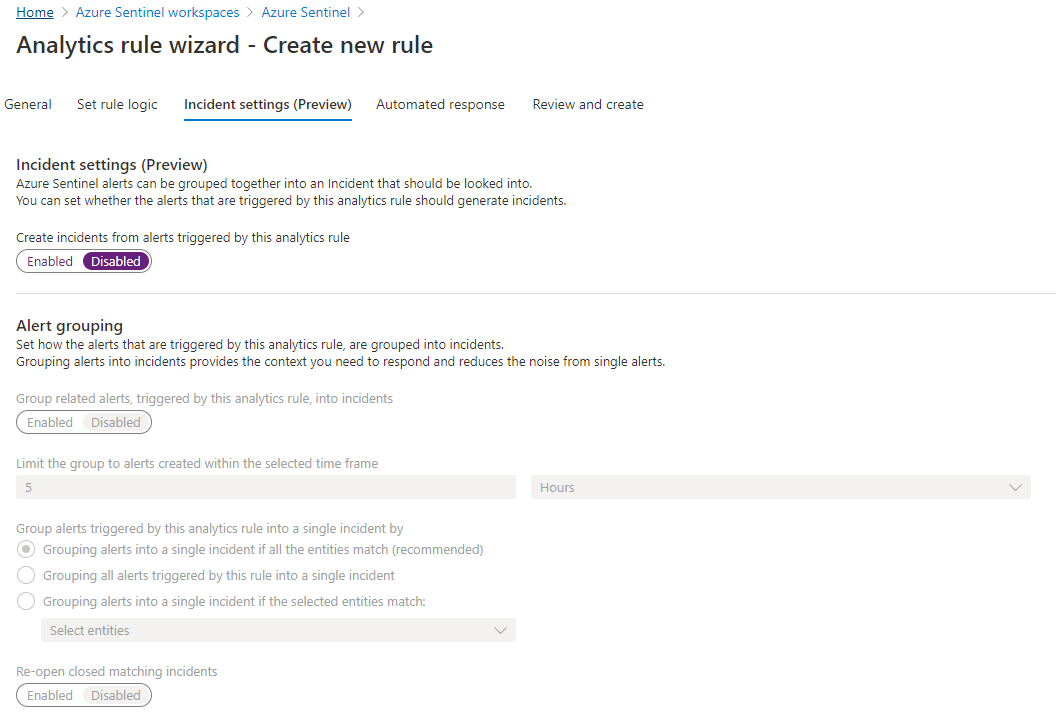
Incident settings
We now need to decide if this alert should create an incident that needs to be investigated or not. Since we decided this is informational, we don't want to be spammed with incidents about this (scanning activity happens all the time).
Automated response
We do want to handle this alert in some way and Sentinel alerts lets us define an automated response.

These are Azure Logic Apps that can be trigged by Azure Sentinel. I have one pre-made here, but we'll see what it does up next!
For now, review and save the alert rule.
Automated response - Azure Logic App
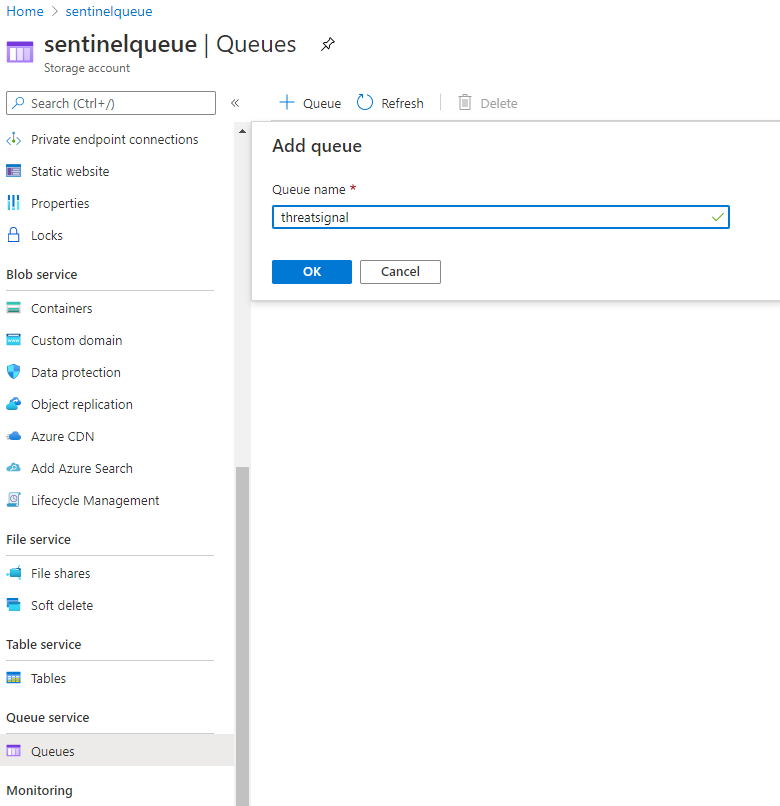
I want to block all suspicious IPs in my local firewall and I don't want to expose any web hooks or similar to do that, so I will use a Azure Queue that my Logic App will add messages to and my local script will read from this queue and update the firewall.
That means we need to create an Azure Storage Account which supports queues!
Once created (should be pretty straight forward) - create a queue with some appropriate name.
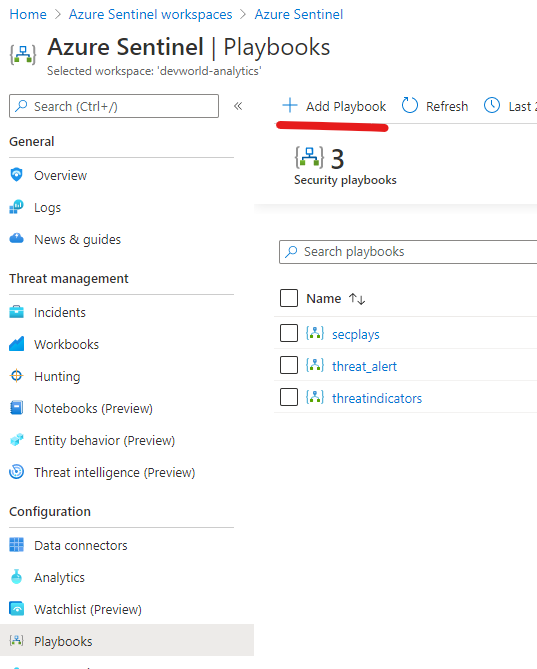
Azure Sentinel Playbook
Now we create our playbook - which is a Azure Logic WebApp with a Sentinel trigger.
The logic app will consist of 3 components:
- Sentinel trigger
- Get the IPs (we mapped the suspicious IP to a IP Entity earlier in the rule, remember?)
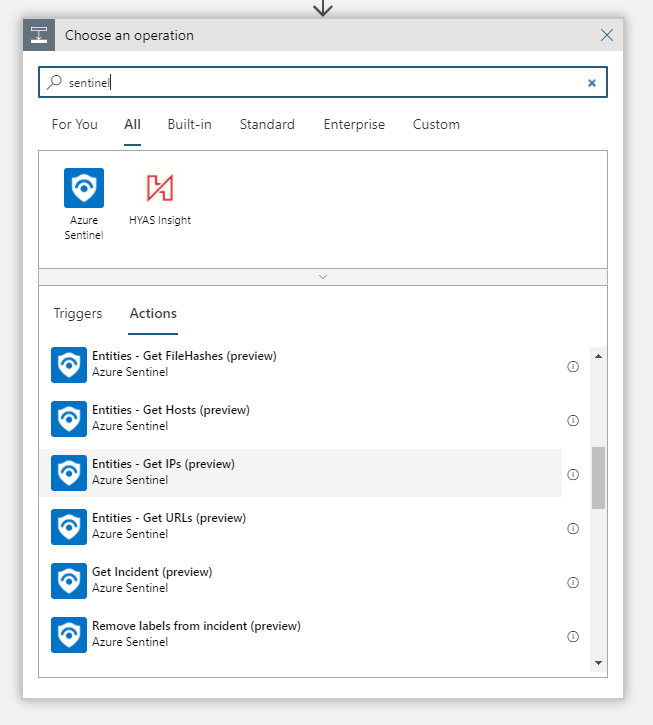
- Add a message to the queue for each suspicious IP
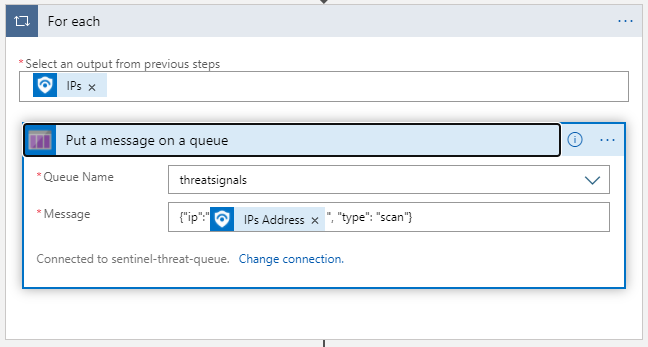
The entire flow looks like this:

From here, you can deal with these messages as you see fit - as I mentioned, I use it to block the IPs in my local firewall and you can read more about that here in this post.
This is just scratching the tip of the iceberg for what Azure Sentinel can handle - there are way more advanced usage scenarios using machine learning and all the bells and whistles.
Thanks for reading - hope it was somewhat inspirational :)