I made a n8n node for Microsoft Defender
While testing n8n for use with Microsoft Defender, I found that there was no integrations available for the Microsoft Defender API - so I made my own. Let me show you how it works.

- Installing the Microsoft Defender node
- Creating the Entra ID application
- Setting up the credentials
- Adding your first Microsoft Defender node
- Summary
I was working with n8n to see if I could create something that would help me automate working with Microsoft Defender API and, well, avoid Microsoft's costly Security Copilot for things such as vulnerability management and SOAR-stuff.
While I could tie together a bunch of nodes to achieve the results I wanted, it turned into a spaghetti of HTTP Request nodes and whatnots. This felt really unnecessary and cluttered up my workspace with a bunch of sub-workflows.
So, I looked for a Microsoft Defender integration for n8n but there was none.
Looking around at the docs, I found that there is actually an easy way to create your own custom nodes so I figured: Hey, why not just make it myself?
If you just want to skip to the code (and maybe contribute?): https://github.com/FrodeHus/n8n-nodes-msdefender
Installing the Microsoft Defender node
To install this community node, go to Settings and Community nodes - click Install and type in n8n-nodes-msdefender and voila - you are ready to go!
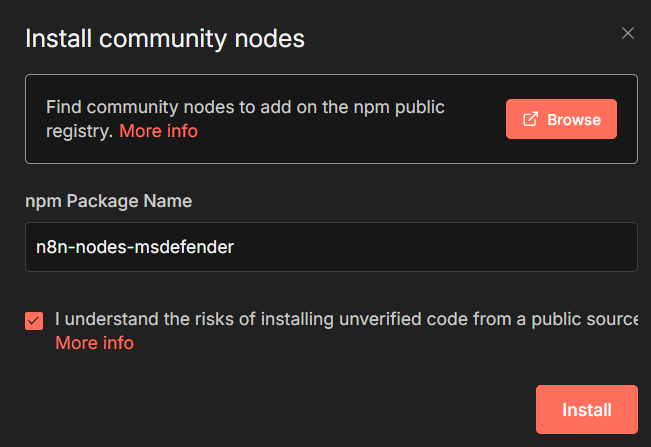
Ok, you have to also confirm that you accept the risk of installing my scary code!
Creating the Entra ID application
Of course, you cannot just install the package and magically n8n can talk to Microsoft Defender. No, no - you have to create a Entra ID App to ensure you have the correct permissions to let the Defender node do its business.
There are plenty of tutorials how to create an Entra ID app registration, so I'll save some time and just list the application permissions you need to grant.
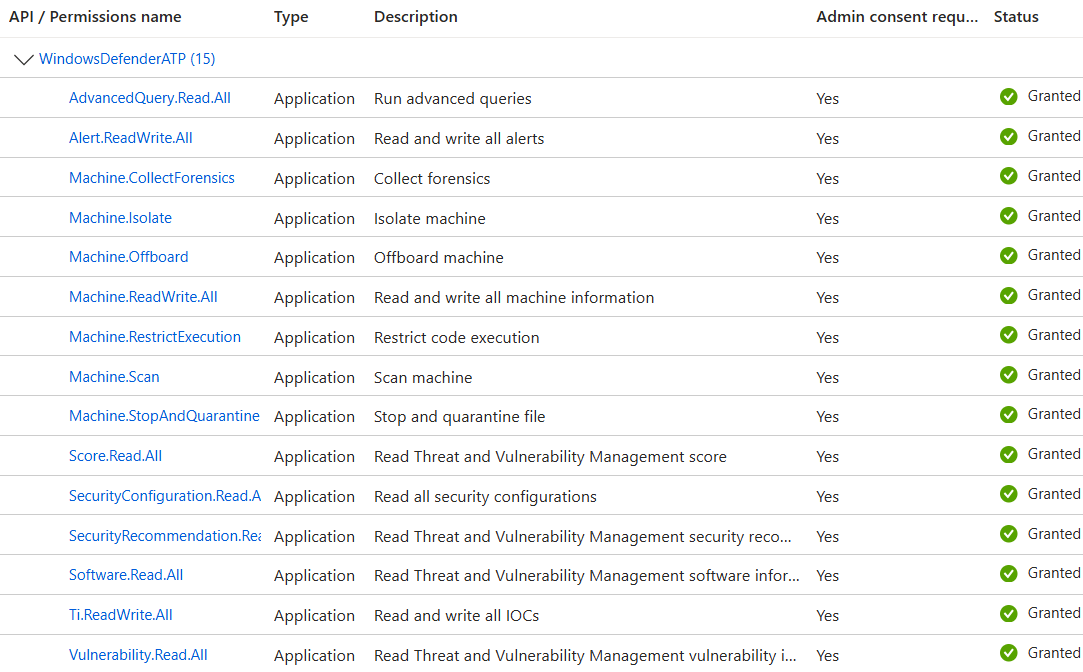
That's a lot of permissions! But, this is an integration for working with these things so if you want the ability to do it then that's just a risk you have to evaluate as well as do a review of my code to ensure I'm not doing anything shady - its all out in the open.
Remember to grant admin consent to these permissions, or it won't work.
Now, create a client secret and take note of the following before moving on:
- Client ID
- Client Secret
- Token endpoint (click on the Endpoints button in the Overview)
Setting up the credentials
Before you can use the Defender node, you need to define the credentials.
To create the credential registration, you can either do it directly from the node when first using it in a workflow or you can create it before use by going to the n8n dashboard and click on Credentials and then Create credentials and look for Microsoft Defender OAuth2 API

Then, fill in the form using the Client ID, Client Secret and Access Token Endpoint from before.
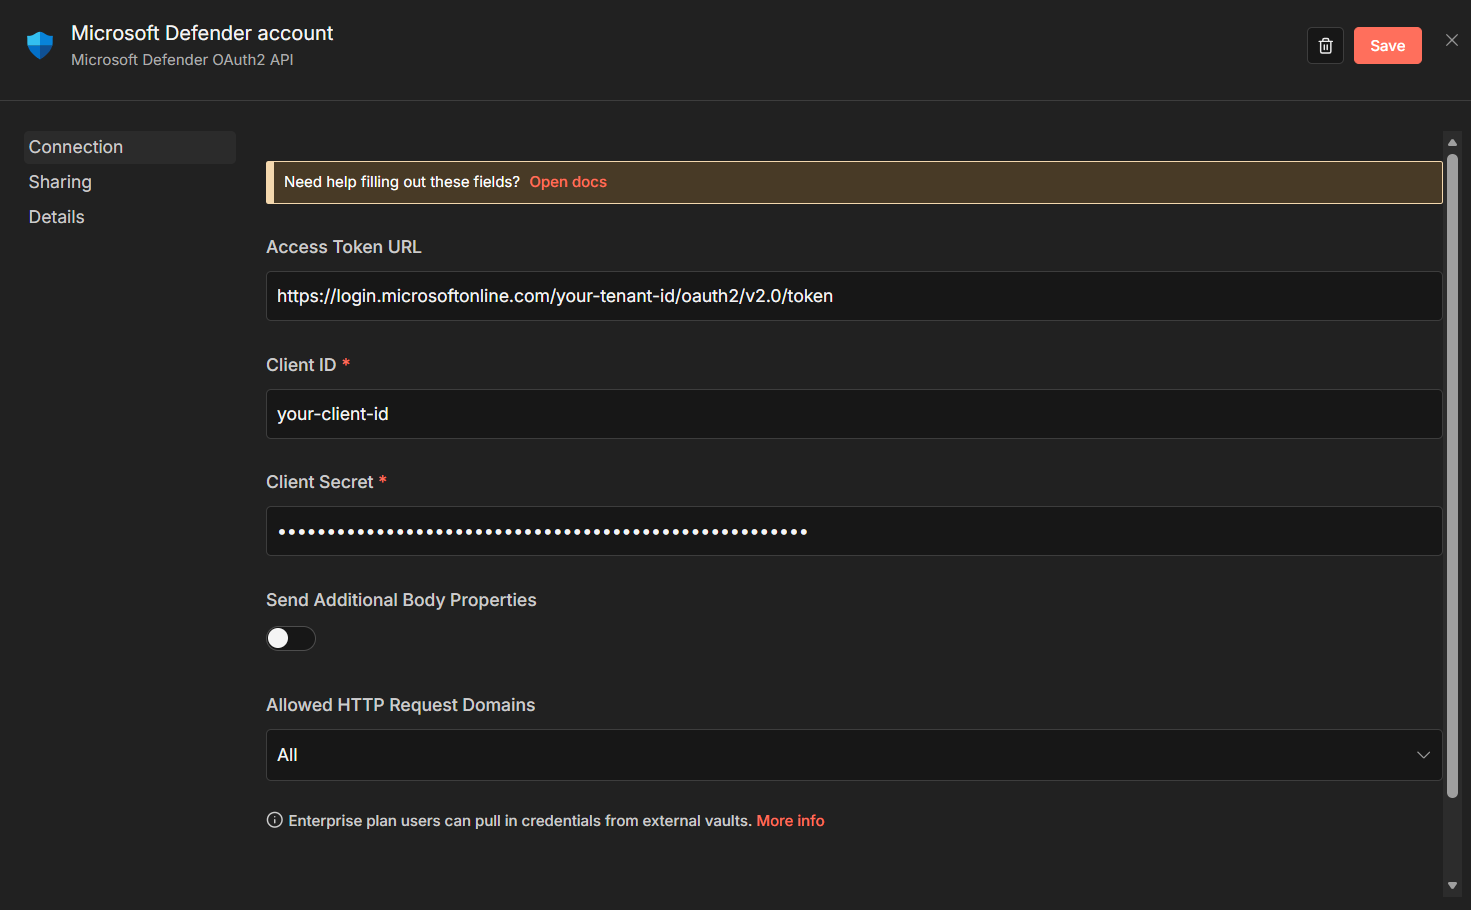
Click Save and you are ready to go.
Adding your first Microsoft Defender node
I'm not going through all of the node capabilities - I think they are pretty self-explanatory, but let's get you started!
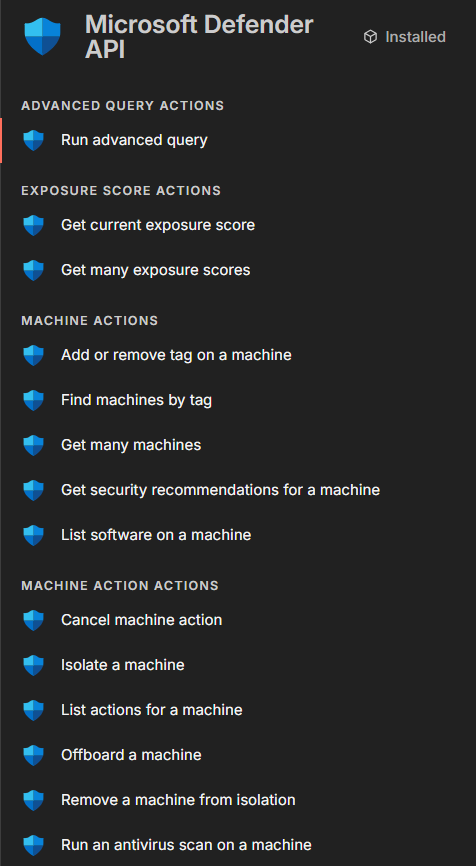
Add a new node and search for defender , you should see the Microsoft Defender API node and when clicking it, you'll see a bunch of operations available - a subset shown in the image below:
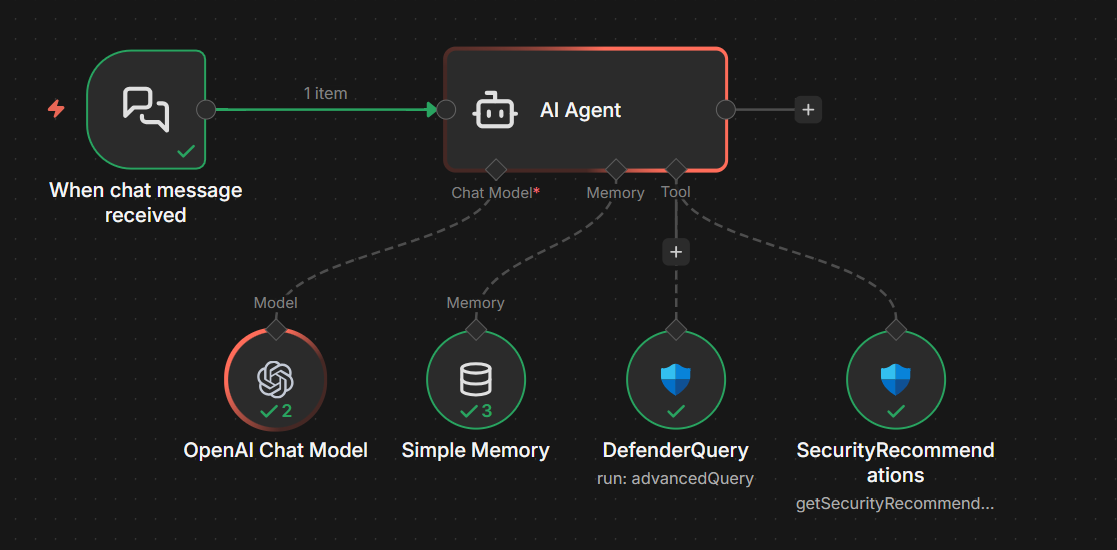
You know what, why not just do a full demonstration - let's quickly make an AI agent where we can ask for security recommendations for devices in our network.
Press play on tape below - watch in fullscreen for all the details.
Fun, huh?
Summary
So, I hope this is helpful for you.
At time of writing, I still haven't implemented the full API, but working on it - feel free to contribute.
Just imagine using this to augment your SOC or create reports on your organisation security posture?
I would love to see what kind of workflows you create!